Webflow Ecommerce is great at taking the money and silent about your accounting. There is no native “post this order to Xero” button, so most stores end up re-keying orders by hand, exporting a CSV that never maps cleanly, or wiring a Zapier flow that breaks on the first multi-line order.
This guide walks through the clean way to connect Webflow Ecommerce to Xero: what “connected” actually means, how to set it up, exactly what maps to what inside Xero, and how to keep every invoice reconciled to the cent.
What “connected to Xero” should actually mean
Before any setup, it is worth being precise about the goal, because most integrations get this wrong.
A good Webflow-to-Xero connection writes real invoices, contacts and credit notes inside your own Xero organisation. Not a copy held in a third-party dashboard, not a proxy, not a CSV you import and reconcile later. Actual Xero records that live in your books and stay there.
The test is simple: if you removed the integration tomorrow, everything it created should still be in your Xero, untouched. That is the difference between an integration and a data silo, and for accounting it matters more than any feature, because your books have to survive the tools you use to build them.
The setup, step by step
Connecting is a few minutes of work, and you only do the mapping once.
- Connect your Webflow site. Authorise read access to your store’s ecommerce orders. No Designer changes, no code, and the connection is read-only, so it can never alter your store, products or customers.
- Connect your Xero organisation through Xero’s own secure sign-in (OAuth). You are never handing over a Xero password; you approve the connection inside Xero and can revoke it there at any time.
- Map your accounts once. Choose which Xero accounts orders post against: a revenue account for product sales, a shipping account (or fold it into revenue), a clearing or bank account for payments, and your Xero tax rates. This is the only real decision, and the mapping dropdowns only show the appropriate account type for each field, so revenue points at an income account and the clearing account points at a bank account.
- Choose a backfill window. On connection, recent order history is imported so your books are not starting from an empty slate. You can pull back further on demand when you need more history.
After that, new orders post themselves. You only ever touch the exceptions.
Exactly what maps to what in Xero
This is where a real integration earns its keep. A Webflow order is a structured object, not a single total, and it has to land in Xero the way an accountant would enter it.
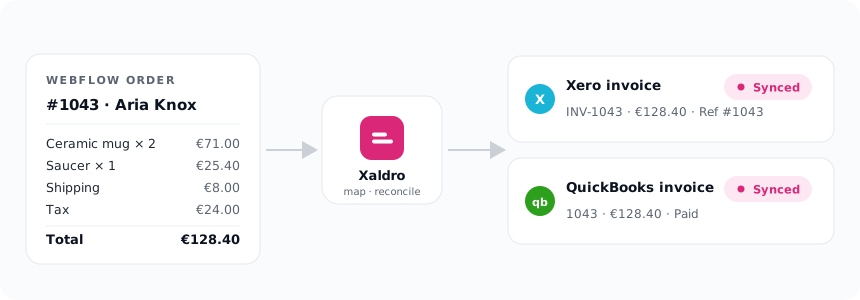
- One invoice per order. Each Webflow order becomes one ACCREC (accounts receivable) invoice in Xero, posted as Authorised, not left as a draft you have to approve by hand.
- One line per product. Every line item in the cart becomes its own invoice line with the correct quantity and unit price, so the invoice mirrors what the customer actually bought. This is the exact step a single Zap cannot do cleanly, because turning an array of line items into separate invoice lines is not what field-mapping tools are built for.
- Shipping as its own line. Shipping is posted as a separate line against your chosen account, so it never gets buried inside the product totals.
- Discounts handled explicitly. A discount posts as its own negative line, so the invoice breakdown matches the real order rather than a rounded figure.
- Tax the Xero way. Webflow prices are tax-exclusive; the Xero tax rate you map drives the tax Xero computes per line. Map a single default rate, or map specific rates per destination region if you sell into multiple tax jurisdictions.
- The Webflow order id in the reference field, so every Xero invoice traces straight back to its order in one click.
- Contacts matched by email. The customer is found or created as a Xero contact, matched on email address so you never end up with duplicate contacts cluttering your ledger.
The result is an invoice in Xero that looks exactly like one you would have entered carefully by hand, produced automatically the moment the order is placed.
Paid, not just invoiced
Getting an invoice into Xero is only half the job. The other half is showing it as paid, so it does not sit as an open receivable forever.
If you map a clearing or bank account, the payment is recorded against the invoice so it lands as Paid rather than awaiting payment. That clearing account is then what you reconcile your Stripe payout against when the money actually arrives in your bank, which keeps month-end clean and stops the gap between “invoiced” and “in the bank” from growing.
If you leave the clearing account unmapped, invoices still post correctly; they simply post as awaiting payment for you to handle manually.
Refunds become credit notes
Refunds are where most Webflow-to-accounting setups quietly fall apart, because a flow that only creates invoices has no path for money going back out.
When you refund an order in Webflow, a matching credit note is posted in Xero, allocated against the original invoice. Revenue and receivables come back down by the right amount, so a return does not leave your books overstating what you actually earned.
Reconciled to the cent, or held with a reason
The feature that makes this safe to run unattended is the reconcile guard.
Before anything posts, the invoice total is checked against what the customer actually paid. If the numbers do not line up, most often an unmapped tax rate, or a tax rate that does not match the order, the order is held with a clear reason instead of posting something wrong. It never posts a wrong number, and it never posts the same order twice, even if a webhook is delivered twice or a sync is retried.
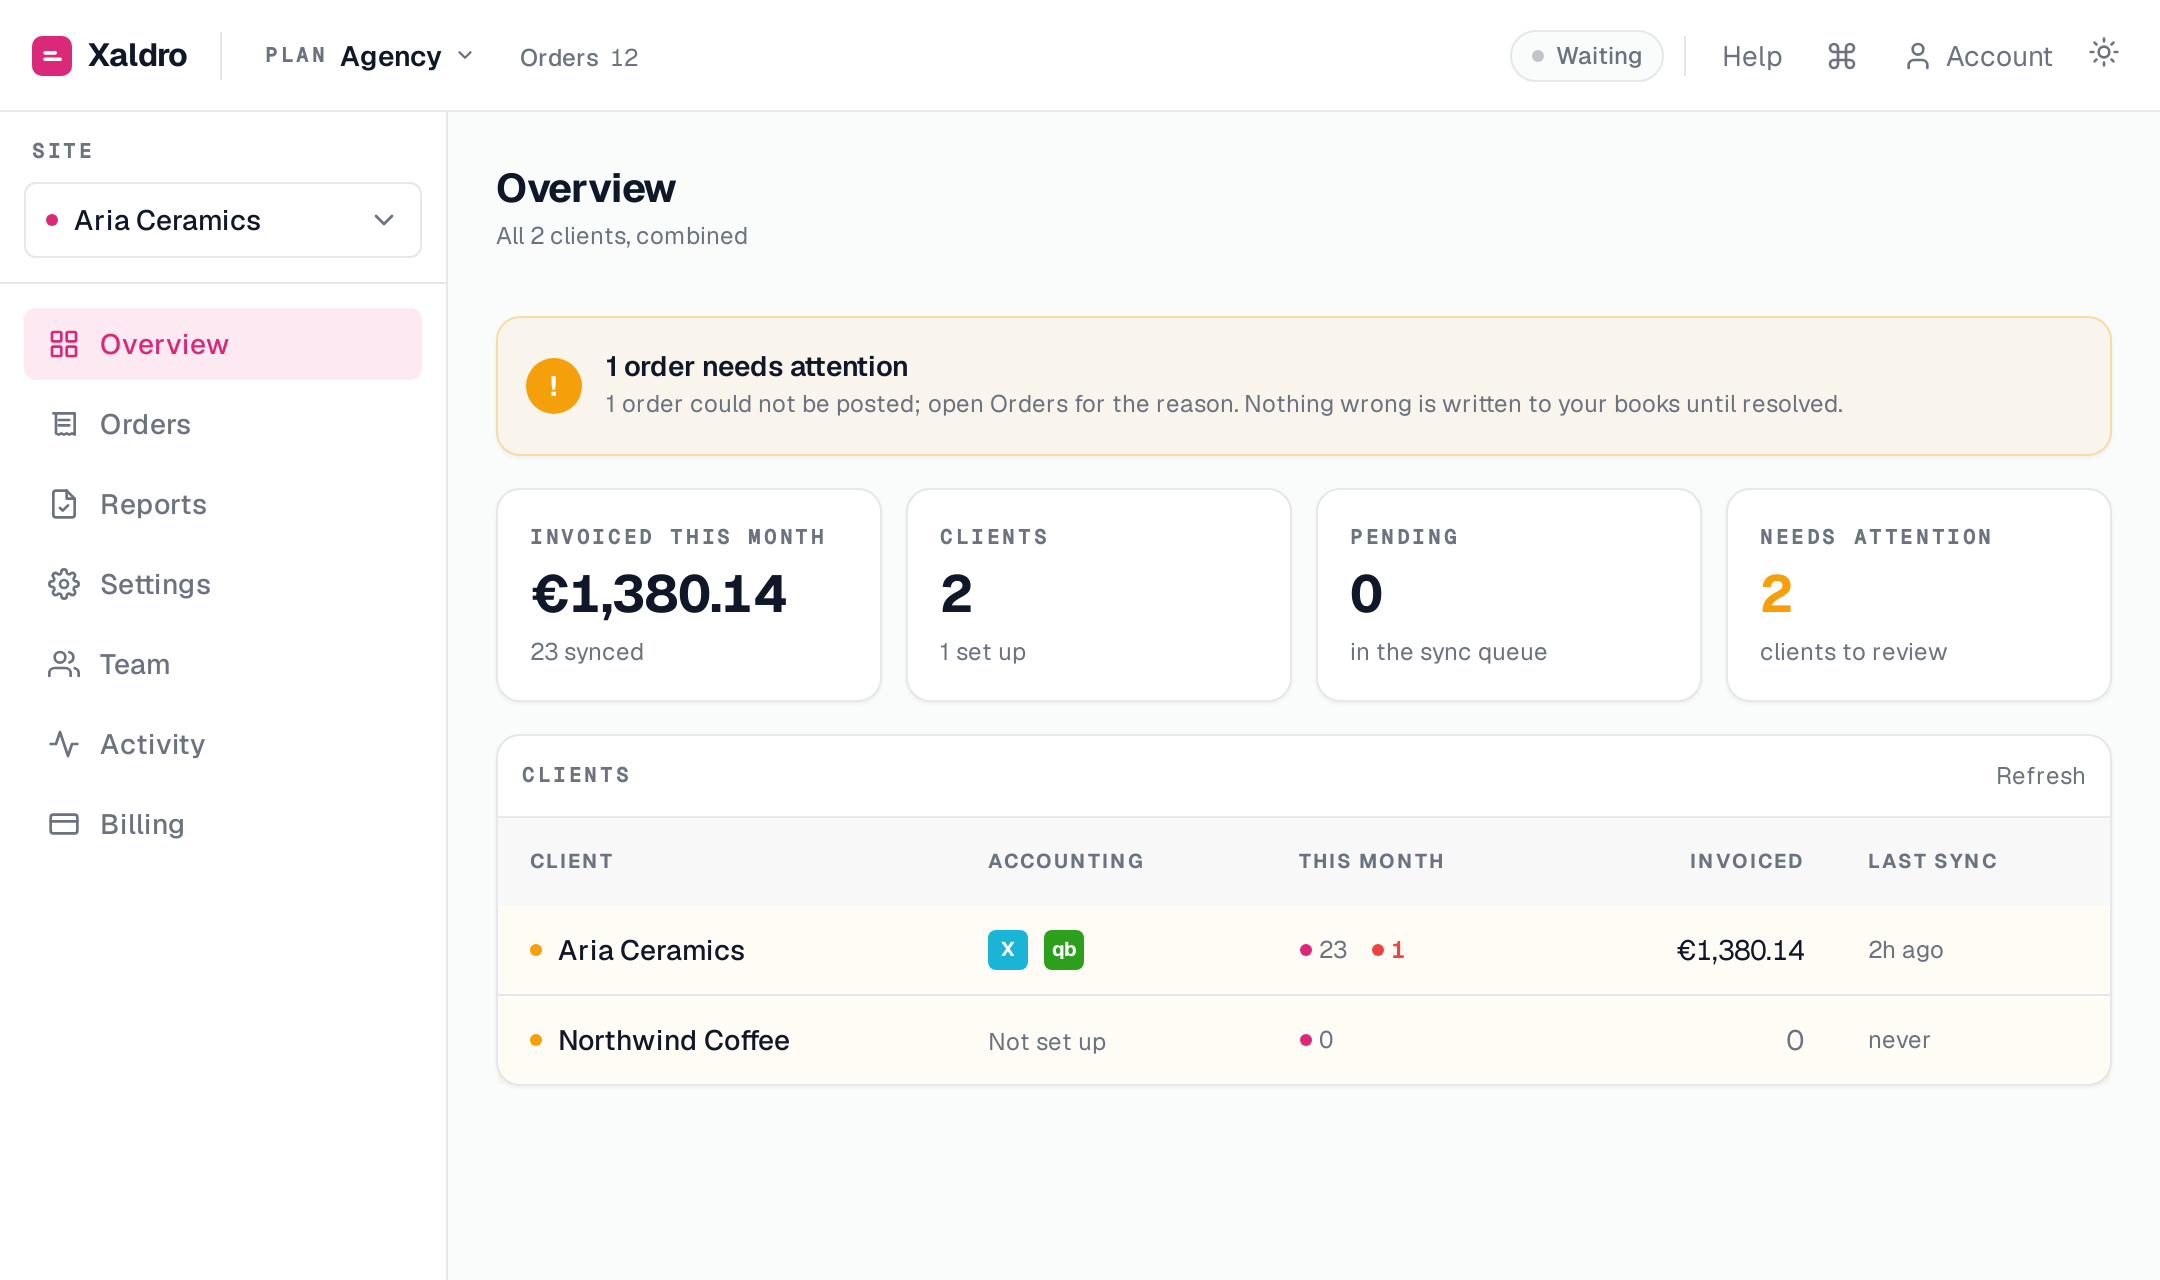
In practice that turns your accounting from something you have to re-check into a short list of explained exceptions. If nothing is flagged, everything that posted is known to be right.
A currency detail we hit building this
One thing worth knowing before you connect, because it caught us out in testing: Xero will not post an invoice in a currency your organisation is not set up for. We ran a store selling in USD against a Xero organisation whose base currency was EUR and that did not have multi-currency enabled, and the invoice simply could not post. The useful part was that instead of failing silently somewhere mid-sync, the order was held with a plain message saying the currency was the reason. The fix is easy once you know to look for it: either your Webflow store currency matches your Xero base currency, or you enable multi-currency in Xero. It is exactly the kind of thing that only surfaces on a real order, which is why being held with a clear reason beats a silent failure.
Why not just use Zapier or Make?
For a demo, a Zap works. On real orders it breaks in predictable ways: it flattens multi-line carts into a single line or reads only the first item, it drops shipping and discounts so the total drifts, it rarely handles refunds at all, and it can double-post on retries. On top of that, Zapier and Make bill per task, and a correct sync is multi-step, so the bill climbs exactly when your order volume does.
A native Xero connection maps line items correctly, reconciles to the cent, posts refunds as credit notes, never duplicates, and charges a flat monthly rate instead of billing you per run.
Getting started
Xaldro connects Webflow Ecommerce to Xero exactly as described here: real invoices, contacts and credit notes in your own Xero organisation, reconciled to the cent, with shipping, discounts and tax mapped correctly and the order id in every reference. On connection it backfills recent history so your books are current from day one.
Pricing is flat monthly, no per-task fees. You can start on a 14-day free trial or your first 100 synced orders, whichever comes first, with no card required. Point it at a Xero demo organisation first if you want to watch it work before it touches your real books.